BlogKnowHow apologies for the technical problems with the site. We are working on it and hope to resolve the issue as soon as possible.

Showing posts with label Increasing Site Traffic. Show all posts

Wednesday, August 5, 2009

Add Social Bookmark Buttons to Blogger

In today's Blogger tutorial (Blogspot tutorial) you will learn how to place social bookmark buttons in the sidebar, footer and below each post in a Blogger Blogspot blog. This is a social bookmarking script for individual buttons or icons rather than the Add This all-in-one solution that I have previously written about. These free social bookmark buttons will encourage social bookmarking SEO by having your visitors save their favorite content and hopefully share it on social media sites such as Digg, Technorati and Stumble Upon thereby helping to grow your blog traffic.

I personally prefer to use an Add This social bookmark button because individual buttons can create a cluttered busy look. However, I also realize that the Add This social bookmarking button is not necessarily that recognizable to visitors who may have otherwise bookmarked your pages had the button been more recognizable to them.

YahooTwitterTechnoratiStumble UponRedditGoogleFacebookDiggDel.icio.us

Diggdel.icio.usMySpaceYahooTwitterTechnoratiStumble UponReddit


How to Add Social Bookmark Buttons to Blogger Sidebar or Footer

1. Login to Blogger if not already logged in

2. Navigate to Page Layout > Page Elements

3. Click on Add Gadget in Sidebar or Footer

4. Select HTML/Javascript gadget from the list of available gadgets

5. Copy and paste the social bookmarking button code into the content box that is available for free download below. Note you will only be able to add the small social bookmarking buttons to the sidebar unless you only want a few of them.

Download Code for Large Buttons (48x48)
Download Code for Small Buttons (24x24)

6. Add a title such as Bookmark and Share if you wish

7. Click on the Save button

8. Use the drag and drop feature in the sidebar to reposition the new widget if necessary and save again

9. Click on View Blog to admire new social bookmarking buttons


How to Add Social Bookmark Buttons Below Every Post in Blogger

1. Login to Blogger if not already logged in

2. Navigate to Page Layout > Edit HTML

3. Back up your template as a precaution by downloading it to your computer

4. Check the Expand Widget Templates box

5. Find the following line of code using CTRL + F

<p><data:post.body/></p>

or

<data:post.body/>

6. Paste the button code below directly below this line

Download Code for Large Buttons (48x48)
Download Code for Small Buttons (24x24)

7. Click on the Save Template button to save

8. Click on View Blog to admire your new social bookmarking button set at the bottom of your blog


Tips and Troubleshooting
  • To center the social bookmarking buttons
    <p><data:post.body/></p>
    <div align='center'>
    Your social bookmarking button code goes here
    <br/>
    </div>

  • To have your social bookmarking buttons only appear on post pages you will need to enclose the code in an if statement

    <p><data:post.body/></p>
    <b:if cond='data:blog.pageType == "item"'>
    Your social bookmarking button code goes here
    <br/>
    </b:if>

  • To center the social bookmarking buttons and have them appear only on post pages
    <p><data:post.body/></p>
    <b:if cond='data:blog.pageType == "item"'>
    <div align='center'>
    Your social bookmarking button code goes here
    <br/>
    </div></b:if>

  • To center the social bookmarking buttons and have them appear only on post pages
    <p><data:post.body/></p>
    <b:if cond='data:blog.pageType == "item"'>
    <div align='center'>
    Your social bookmarking button code goes here
    <br/>
    </div></b:if>

  • To add extra social bookmarking buttons to this set download the Aqauticus Icon Set

  • To change the social bookmarking buttons for another set simply do the following:

    1. To find other social bookmarking buttons please do check out my article Best Free Social Bookmark Button Sets for Blogger first as very likely you will find something suitable in that collection. Download your preferred icon set. These will be in a zip file so you will need to unzip them and take a look at what sizes are on offer. Most icon sets come in at least several sizes.

    2. Upload your button images to Blogger or to an image storage site like Photobucket or Flickr. One easy way to upload to Blogger is to create a post called images that you never publish. Then upload the images you want individually (that's the drawback). Copy the URL address of the button image and paste it into the social bookmarking button code replacing existing URLs

    3. Change the URL address of each button in the button code I have supplied. That's the code beginning with scr='


In today's tutorial you have learned how to add social bookmark buttons using a social bookmarking script to the sidebar, footer and below each post in a Blogger blog (Blogspot blog). I have supplied you with the code for a small and large social bookmarking button set to get you started. I suggest you download the codes first and install them on your blog. Then it is just a simple matter of changing the URL address of the social bookmarking buttons if you wish to substitute these for a new set of social bookmarking buttons. Also in this tutorial I offered you some tips and troubleshooting suggestions for adding your social bookmarking buttons to Blogger. If there are other issues that crop up for you as always please ask. I am interested in hearing from anyone about how they got on installing these social bookmark buttons.


Related Articles
List of Blog Know How Tutorials for Blogger Blogs
Add a Social Bookmarking Button to Blogger
Best Free Social Bookmark Icon Sets for Blogger

Monday, July 20, 2009

Increase Google Page Rank Blogger Blogspot

Today I continue my series of articles on search engine optimization SEO for a Blogger Blogspot blog. The focus of this article is on increasing the Google Page Ranking of your Blogger Blogspot blog. If your blog is like mine and relatively new you will find getting off the lowest rung of the Google Page Ranking a bit of a mission but it can be done particularly if you use solid SEO techniques.

To recap search engine optimization is the process of making your website search engine friendly. As major search engines like Google and Yahoo will drive most of the traffic to your blog the more search engine friendly your blog is the more traffic you are likely to receive.

There are a number of SEO - search engine optimization techniques you can employ on your blog to boost traffic such as adjusting titles tags, making use of meta tags, using keywords and keyword phrases, improving keyword density, submitting your blog sitemap to search engines. I have discussed these in detail in my article SEO Tips for Blogspot Blogger blog.

I have already written a number of other articles about SEO for Blogger Blogspot blogs too including the following articles so if you want help with basic search engine optimization try these:

How to Create Search Engine Friendly Permalinks for Blogger
Add Breadcrumb Navigation to Blogger Blogspot Blog
Add Meta Tags to Blogger Blogspot Blog for Better SEO
Adjust Blogger Title Tags for Better SEO
How to Add a Blogger Sitemap to Major Search Engines
Submit You Blogspot Blog to Yahoo
Add Blogger Sitemap to MSN Live
10 Tips to Build Traffic for Blogspot Blogger Blog

Once you've started employing these SEO (search engine optimization) techniques and tips you are going to want to measure your blog's progress. Two important tools that measure the popularity of websites are Google Page Ranking and Alexa Ranking.

Improve the Google Page Ranking of Your Blogger Blogspot Blog
Google Page Ranking is a tool which ranks websites listed in the Google search engine. Websites are ranked on a scale of 0-10 with 0 being the lowest possible score for a site and 10 the highest. The higher the page ranking of your site, the greater the amount of traffic it receives in comparison to other sites. Check your Google Page Rank.

Google uses a complex formula to rank websites which I am not going to cover here. However there are some basic tips about Google Page Ranking that are useful for any Blogger webmaster to know.

  1. Make sure your posts are keyword rich.
    Google expects good usage of keywords so make sure your Blogger blog posts have a density of 3-5%. Keyword density is calculated by the number of keywords divided by the number of total words on a page. If your blog article is 500 words long and has 10 keywords it has a keyword density of 2%. A keyword density of anywhere between 2% and 7% is considered an acceptable range by Google. Anything percentage higher than 7% may well be regarded as keyword stuffing and your blog is likely to be penalized. You can check the keyword density using tools like

  2. Post to your blog frequently
    Make sure you post frequently as Google prefers fresh pages and does not like out of date sites

  3. Create internal links
    Link to previous articles you have written. If you have not cross linked as you posted it is probably worth going back and doing this even if it is a bit arduous.

  4. Build external links to other sites on an ongoing basis
    Build links on a regular basis by commenting on other related blogs and in forums. Add social bookmarking buttons to your blog to encourage readers to bookmark and share your articles. Be aware though that many sites such as Reddit, Digg and del.icio.us implement the link attribute rel="nofollow" which will not boost your ranking.

    Ensure your blog is properly indexed by major search engines. List your blog in blog directories. Watch out for blog directories though as some require you to put a link on your blog but do not reciprocate with a link. See my article on getting listed in blog directories for further help.

    It is worthwhile to link to other blogs you may own as well but doing this will not boost your page ranking particularly. Google is weighted to give a higher ranking to links from other high ranking blogs especially if they are relevant to the content of your blog. The higher the ranking of the site externally linking to yours the better. So essentially you can't just create a bunch of blogs and link to them with the expectation that your Google Page Rank will miraculously increase overnight. Far better to spend your time concentrating on creating a small group of links to quality sites with a high Google Page Rank than going all over the net creating links to low ranking sites.

  5. Another aspect to consider when building quality external links is to ensure that your keywords and phrases appear in links which point to your site. Google analyzes these links so have the linking text contain your keywords to get the most out of them.

Check the Ranking of Your Blogger Blogspot Blog in Alexa
Alexa.com is a website that measures the traffic levels of websites. An Alexa rank is measured according to the amount of users visiting your website with the Alexa toolbar installed and takes into account page views, number of users and three months of historical data.

The Alexa rank is measured according to the amount of users who’ve visited a website with the Alexa toolbar installed. This is kind of an odd way to measure traffic but that is how it works. However it is a well established measure of the value of your site against others so it is useful to see how highly your blog is rated in Alexa. Provided your blog has been around a month or two you can check out how your blog is ranked by visiting Alexa's site info page

Visit Alexa Site Info Page to check the rank of your Blogger Blogspot blog

Alexa supplies you with statistics and information about your blog's traffic and ranking in handy graphical format


If you want your Blogger Blogspot blog to improve its Google Page Ranking concentrate on building quality external links. Google likes it when your site is getting linked to by other sites. The more the content is related the better. In this article I have given you some pointers about how to boost the Google Page Ranking of your Blogger Blogspot blog. If you have time let me know how you get on. Particularly how quickly you got off the Google Page Rank of 1 and how you did it. I'm sure other readers would be interested too.


Related Articles
List of Blog Know How Tutorials for Blogger Blogs
Blogger Blogspot SEO Tips and Tricks
How to Create Search Engine Friendly Permalinks for Blogger
Add Breadcrumb Navigation to Blogger Blogspot Blog
Add Meta Tags to Blogger Blogspot Blog for Better SEO
Adjust Blogger Title Tags for Better SEO
How to Add a Blogger Sitemap to Major Search Engines
Submit You Blogspot Blog to Yahoo
Add Blogger Sitemap to MSN Live
10 Tips to Build Traffic for Blogspot Blogger Blog
Get Your Blogger Blogspot Blog Listed in Blog Directories

Friday, July 3, 2009

Add a Twitter Followers Counter to Blogger

In this tutorial you will learn how to place a Twitter Follower Counter on your Blogger Blogspot blog to display the number of followers you have on Twitter. A Twitter count button will encourage readers to follow you on Twitter much in the same way as putting a Feedburner subscriber counter on your blog will encourage new subscribers.

How To Place a Twitter Followers Counter on Blogger

1. Login to Blogger if not already logged in

2. Navigate to Layout > Page Elements

3. Click on the link to Add a Gadget to the sidebar or footer

4. Select HTML/Javascript from the list of gadgets

5. Paste the following script into the widget content box depending on the button your prefer:

Standard Button

<script type="text/javascript" language="javascript" src="http://twittercounter.com/embed/?username=yourTwitterusername"></script>


Black Button
Twitter Followers Counter Black Button
<script type="text/javascript" language="javascript" src="http://twittercounter.com/embed/?username=yourTwitterusername&style=black"></script>


Big Bird Button

<script type="text/javascript" language="javascript" src="http://twittercounter.com/embed/?username=yourTwitterusername&style=bird"></script>


If you would like to view more Twitter Counter badges you will find them at http://twittercounter.com/pages/buttons/

6. Replace the username with your own Twitter username. For example my username is blogwizz so I would enter username=blogwizz. If you are not already a member of Twitter sign up is a breeze

7. Enter a title for the widget if you wish

8. Click Save

9. Move your new widget into position on your sidebar by using Blogger's drag and drop feature

10. Click the View Blog link to admire your new Twitter Followers Counter


In this tutorial you have learned how to put a Twitter Followers Counter on your Blogger Blogspot blog so that you can display an accurate count of your Twitter followers. This will encourage other readers to begin following you on Twitter.


Related Articles
List of Blog Know How Tutorials for Blogger Blogs

Tuesday, June 16, 2009

Add Email Subscription Form and Links to Blogger Blogspot

Email Subscription Form as seen in a Blogger Blogspot blogIn this tutorial you will learn how to add an email subscription form to your Blogger Blogspot blog so that your visitors will have easy access to your latest updates via email. Adding an email subscription form to your blog is very easy to do and is one way to stimulate repeat visits to your blog.

Below is a step by step walkthrough of how to add an email subscription form to a Blogger blog. I have broken down the steps so that even beginners and newbies can easily follow the steps.

Why Offer the Option to Receive Updates Via Email?
If you are keen to have your visitors return to your blog then as a webmaster you can facilitate this by giving them options about how they would like to receive your updates. Receiving updates by email is just one of several options that you can offer your visitors to turn them from a one time visitor into a regular follower. Other common choices are to follow you in a reader such as Google Reader or alternatively follow you on Twitter. I have recently set up my feed to feed directly into Twitter using the Twitterfeed service so that my readers can follow me on Twitter.

How to Set Up an Email Subscription Form at Feedburner
In order to set up an email subscription link or form at Feedburner you first need to have your feed burned by Feedburner. If you are not sure how to do this please read my step by step article on burning a Blogger RSS Feed at Feedburner or follow these brief instructions

1. If you are using your Google Account click on the My Account link and choose Feedburner from the list. Alternatively go to Feedburner and sign in. If you aren't registered you can quickly create a free account using your Google Account.

2. After logging in you will be taken to the My Feeds Page. If you already have your feed burned skip to Step 3 otherwise follow these instructions to burn your feed.

If you need to burn your feed first enter the URL of your Blogger blog into the Burn a Feed Right This Instant box and click Next.

Burn a Feed Right This Instant with Feedburner
You will need to enter the title of your new feed. I suggest you use your blog title as your title. You will also be asked to choose a feed so choose the RSS Feed. You will then be taken to a success page and a message something like Congrats! Your FeedBurner feed is now live. After clicking Next you will now be prompted to customize your options. Read how to do this in my article about burning a Blogger RSS Feed at Feedburner. Once you have finished customizing your options click Next to proceed to the My Feeds Page.

3. Once you have your feed click on the link to it from the My Feeds Page. This will direct you to the Feedburner dashboard.

4. Now select the Publicize tab.

5. From the left sidebar click Email Subscriptions

6. Scroll down to the bottom of the page and click on the Activate button. If you are not sure what email address you are using for your account you can check this first.

7. You will now be taken to the Subscription Management Page.


8. Choose your language. The default is English

9. From the dropdown menu Use a Widget in select Blogger. The default is Typepad. The orange Blogger favicon will now show up.

10. To Automatically Insert the Subscribe By Email Widget into Blogger

  1. Click on the GO button next to the Blogger Widget.
  2. You will be taken to the Blogger Add Page Element Page where you can select your blog from a dropdown menu if you have more than one blog.

    Blogger Add Page Element Page to insert email subscription widget into your blog
  3. Click on the Add Widget button and your subscribe by email widget will be added to your blog.
  4. You will now be taken to the Layout > Page Elements page
  5. Reposition your widget and save any changes. By default the widget is added to the top of your Blogger sidebar.

Note:If you find that the Page Elements Page does not load properly click on View Blog and you will find that the widget has been inserted. You can then go back and reposition it.


To Manually Insert the Subscribe By Email Widget into Blogger
  1. Copy the code and navigate to the Layout > Page Elements screen in Blogger.
  2. Select Add a Gadget in the area you wish the subscribe by email widget to appear (in most cases this will be the sidebar).
  3. Choose HTML/Javascript widget
  4. Paste the widget code into the content box
  5. Click on the Save Button
  6. Reposition the widget if necessary. A good place is at the top of the right sidebar and Save.
  7. Click on View Blog to see your new email form in your blog


Add an Email Subscription Link to Blogger
Note you can also add an email subscription link to your blog. Either copy and paste the link from the Feedburner Subscription Management Page into your blog or you can automatically insert it by following the same steps as with the automatic insertion of the email subscription form. You will find the code for the link in a text box below the code for the form on the Subscription Management Page. Email subscription links are useful both in the sidebar and beneath each post.

Add Feedburner Email Subscription Link to Blogger Blogspot Blog

Check Your Subscribe By Email Form is Working Correctly
Once your subscribe by email widget is safely installed your form is ready for use. I suggest you test drive it to make sure it is performing correctly. Besides if you sign up you will have at least one subscriber right? Also you may want to regularly check who is subscribing to your blog by email by navigating to the Feedburner > Publicize page for your blog.

1. On the homepage of your blog enter your email address and click on the Subscribe button.
2. You will be take to a Feedburner Email Request screen with a captcha check for spam. Enter the sequence of alphanumeric characters into the text box.

Feedburner Email Request screen with a captcha
3. Click on the Complete Subscription Request button
4. You will now be informed that your request was successful and that you will need to click on the activation code in an email that has been sent to you.
5. Open your email program and retrieve the email and follow the activation link. You will then receive an Email Subscription Confirmed notice from Feedburner. As the notice points out you will only receive an email if you make a post so you will need to get cracking on writing your next post.

Feedburner Email Subscription Confirmed notice

In this tutorial you have learned how to add an email subscription form to a Blogger Blogspot blog so that your readers can enjoy receiving your most recents posts directly to their mailbox. Allowing visitors to sign up for your feed via email will promote your blog and can easily turn a new visitor into a regular follower. An alternative to an email subscription form is to insert a subscription link into your blog. I find a good place for an email subscription link is after each post to encourage visitors to sign up for my feed.


Related Articles
List of Blog Know How Tutorials for Blogger Blogs
Burn a Blogger RSS Feed at Feedburner

Thursday, June 4, 2009

Tips to Add a Digg Button to Blogger Blogspot

Today's article discusses where to place a digg.com button on your Blogspot Blogger blog and shows you how to add an integrated digg button to your blog. The button allows your blog's visitors to digg posts from your blog and submit those articles to Digg.

What is Digg.com?
Digg is a social content site where readers submit stories, videos and images. Depending on interest and popularity articles are commented on by members. You can encourage your readers to digg your stories by adding a Digg button to your Blogger blog. The button will display a real time count of the number of times your post has been dugg.

Digg Large ButtonWhy Add a Digg Button to My Blogger Blogspot Blog?
Why would I want to add more buttons to my blog you may be wondering. Well there are a number of reasons why getting on board with Digg will be helpful to you in growing your blog.

  • Digg is a ready source of traffic that can drive visitors to your blog and it is too important to overlook. When visitors digg your stories it will encourage new readers to visit your blog.

  • Posts that have been submitted to Digg appear in search engine results so your blog will receive exposure.

  • A digg button will encourage visitors to submit your blog's content including images and video to Digg. This will encourage others to comment and write about your post and possibly link to it.


What to Consider When Choosing to Add Digg to Your Blog
When adding a Digg button to your Blogger Blogspot blog there are some important considerations to think of before you get started. You will need to decide about:

  • Digg Compact ButtonThe look of the button to place on your blog as Digg gives you the option of several sizes to choose from. The look and feel of your blog will dictate what button you decide on.

  • What pages your Digg button will display on. Do you want it on the home page as well as the post pages for instance? I strongly advise that you place any integrated button only on post pages otherwise you will find the loading time of your homepage will be noticeably reduced.

  • What position to place the button in on your blog. Under the post title, beside the first paragraph, below the post are all common locations for a Digg button. Placing a button near the top of your posts can be a good ideas as visitors will see it as the page loads because the button will be above the fold ie the area that visitors see without having to scroll down. If you have a bunch of social media buttons at the bottom of your posts already you might want to include your Digg button in this sequence.


Can I Digg My Own Blog Content?
Yes. You most certainly can digg your own Blogger posts as this will get you a listing in Digg.


How to Add a Digg Button to Blogger Blogspot Blog
I am going to show you how to manually change your Blogger Blogspot template to include your Digg button. While this is not a difficult tweak you will be changing your template. Make sure you take care not to overwrite any code. My suggestion as always is back up first by downloading your template before beginning the addition of this code.

To add a large Digg button to appear next to the first paragraph in your Blogger Blogspot posts:


1. Login to your Blogger blog if not already logged in

2. Navigate to Layout > Edit HTML

3. Back up your template by downloading full template as a precaution

4. Check the Expand Widgets Template box

5. Find this line of code using CTRL + F
<p><data:post.body/></p>

6. Paste the Following code above <p><data:post.body/></p>

<!--Digg.com Button-->
<b:if cond='data:blog.pageType == &quot;item&quot;'>
<div style='float:right; margin-left:10px;'>
<script type='text/javascript'>
digg_url=&quot;<data:post.url/>&quot;;
</script>
<script src='http://digg.com/tools/diggthis.js' type='text/javascript'/>
</div></b:if>
<!--end Digg.com Button-->


7. Click on the Save Template button

8. Click on View Blog link and navigate to an individual post page. You will see your new digg button is only visible on the post page.


Customizing Your Digg Button Tips and Troubleshooting
  • To have the Digg button display on all pages not just the individual post pages remove this line:

    <b:if cond='data:blog.pageType == &quot;item&quot;'>

  • To have the Digg button aligned to the left instead of the right change this line from:
    <div style='float:right; margin-left:10px;'>

    to:
    <div style='float:left; margin-left:10px;'>

  • To replace the large button with the compact button replace the code in Step 6 with:
    <!--Digg.com Button-->
    <b:if cond='data:blog.pageType == &quot;item&quot;'>
    <div style='float:right; margin-left:10px;'>
    <script type='text/javascript'>
    digg_url=&quot;<data:post.url/>&quot;;
    digg_skin=&quot;compact&quot;;
    </script>
    <script src='http://digg.com/tools/diggthis.js' type='text/javascript'/>
    </div></b:if>
    <!--end Digg.com Button-->

  • To change the background color of the button from white to your own desired color add this line:
    digg_bgcolor=&quot;#ff9900amp;quot;;

    below this line:
    digg_url=&quot;<data:post.url/>&quot;;

    Note: Change the value #ff9900 to whatever hex color you would like.

  • To move the Digg button to below the post content instead of at the top paste the following code:
    <!--Digg.com Button-->
    <b:if cond='data:blog.pageType == &quot;item&quot;'>
    <div style='float:right; margin-left:10px;'>
    <script type='text/javascript'>
    digg_url=&quot;<data:post.url/>&quot;;
    digg_skin=&quot;compact&quot;;
    </script>
    <script src='http://digg.com/tools/diggthis.js' type='text/javascript'/>
    </div></b:if>
    <!--end Digg.com Button-->

    to the end of the section of code beginning with this line
    <div class='post-footer-line post-footer-line-2'>
    If you have a third post footer line then place this code after that block of code.

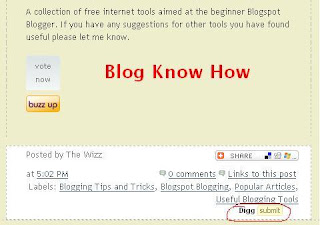
    Add Digg button after labels in post footer

    Add Digg Button to Below Blogger Blogspot Post Content


    In this tutorial you have learned about what Digg is and the benefits of adding an integrated Digg button to your Blogger Blogspot Blog. You have also learned about different placement options for your Digg button and been given step by step instructions on how to customize the Digg button to suit the needs of your blog.


    Related Articles
    List of Blog Know How Tutorials for Blogger Blogs
    Add a Social Bookmarking Button to Blogger

  • Friday, May 22, 2009

    Add Meta Tags to Blogger for Better SEO

    In this Blogger tutorial I will show you the best way to add meta tags to your Blogger blog (Blogspot blog) to improve the SEO of your blog and work around the limitations of the Blogger platform.

    I have observed that there are many Blogger help blogs out there telling you to just add meta tags however this will very likely achieve the opposite result from the one you are after. Whether you are yet to add meta tags or you have added meta tags already make sure you read and follow the methods contained in this article to get the best results.

    What are Meta Tags?
    Meta tags are HTML tags that provide additional information about your blog that is unseen by visitors but available to search engines. The meta description tag, for example, provides a short summary of the page content. The keyword meta tags show the keywords and keyword phrases a visitor might use to find your blog. Because of abuse of meta tags search engines have become smarter and most no longer place emphasis on keywords to establish page ranking however keyword meta tags are still used by some search engines so it is a good idea to include them.

    Limitations of Blogger and SEO
    One of the disappointing aspects of Blogger is that it is not properly optimized for SEO. Meta descriptions and keywords are not supported by blogger.com by default. Title tags are also not optimized. This means that you will miss valuable opportunities to attract visitors to your blog.

    However meta tags and meta descriptions can be inserted into your Blogger template (Blogspot template) to good effect. Fortunately these work arounds will go a long way to improving the placement of your blog in search engine results. Please refer to adjust Blogger title tags for improved SEO for help with title tags.

    Simply placing a meta tag description in your Blogger template is problematic because Blogger will use the same meta tags for all pages in your blog. This means that every entry that Google has for your site will show in search results with the same description. This solution would result in reduced traffic rather than increased traffic. However there is a way to add meta tags to the home page of your blog only which will not affect post pages in your blog. In this way visitors will find the home page of your blog in search engines by the use of appropriate keywords and a site description.

    How to Add Meta Tags to a Blogger Blogspot Blog Home Page
    1. Login to Blogger if not already logged in

    2. Navigate to Design > Edit HTML

    3. Back up your template as a precaution by downloading full template to your computer.

    4. Check the Expand Widget Templates box

    5. Find these lines which will be near the top of your template:

    <head>
    <b:include data='blog' name='all-head-content'/>
    <title><data:blog.pageTitle/></title>

    6. Paste the following code immediately below <title><data:blog.pageTitle/></title>

    <b:if cond='data:blog.url == data:blog.homepageUrl'>
    <meta content='Place your blog description here' name='description'/>
    <meta content='Place your blog keywords here(separated by commas)'
    name='keywords'/>
    </b:if>

    7. Enter your blog description between the single quote marks under description. Maximum 150 characters

    8. Enter the keywords of your blog between the single quote marks under keywords. Ensure you separate each keyword or keyword phrase by a comma. Make sure your keywords do not exceed 200 characters

    By way of example here are the meta tags I use for the home page of Blog Know How:

    <b:if cond='data:blog.url == data:blog.homepageUrl'>
    <meta content='Find tips,tricks,tutorials,walkthroughs to customize your Blogger Blogspot blog.SEO,Banners,Adsense,gadgets,fixes,feeds,rss,help for beginner bloggers' name='description'/>
    <meta content='blog,blogger,blogger.com,blogspot.com,blogspot,blogging,tutorials,tips,blogger help,customize blogger,SEO,make money,gadgets,Google Adsense,banners, feeds,analytics,solutions'
    name='keywords'/>
    </b:if>

    Best Way to Add Meta Tags to Blogger Blogspot Blog
    9. Click on the Save Template button

    10. To see your description in action you can either navigate to your blog's home page and click on view source in your browser. In Internet Explorer you will find this option in the view menu. A text document will appear which you can scroll through. You will see your description near the top of the document. Alternatively you can check your description in a free Meta Tag Analyzer tool such as Submit Express or SEO Centro


    How to Add Meta Tags to a Blogger Blogspot Blog Individual Post
    1. Follow steps 1 to 4 as for adding meta tags to the Home Page

    2. Add the following in the <head> section of your Blogger template. Enter this code below the Home Page code above you have just entered:

    <b:if cond='data:blog.url == "http://url of your post"'>
    <meta content='keywords pertaining to your post' name='keywords'/>
    <meta content='crafted description of your post' name='description'/>
    </b:if>

    Here is an example of optimized meta tags for this post:


    <b:if cond='data:blog.url == "http://blogknowhow.blogspot.com/2009/05/add-meta-tags-to-blogger-for-better-seo.html"'>
    <meta content='meta tags,optimize blogger,blogger SEO,search engine optimization, blogspot,blogger,blogspot.com,blogger.com,blogging,blog' name='keywords'/>
    <meta content='Improve SEO by adding meta tags to your Blogger Blogspot blog. Step by step tutorial shows you how to add meta tags to the home page and a single post' name='description'/>
    </b:if>

    Add Meta Tags to Blogger on a Single Post
    3. Add your post URL, keywords and description. To find the URL of your post navigate to the post's page and copy the link showing in the address bar of your browser including the http:// prefix

    4. Click on the Save Template button

    5. To check your description you can use the view source in your browser once you have navigated to the post page or a meta tag analyzer

    Note: This method is suitable if you have a few key posts that you want to ensure you get maximum traffic on. If you have a lot of posts this manual method would be very tedious. I don't know of any automated method or script to add meta tags at this point but I am investigating it and will keep you posted.


    Analyze Your Blogspot Blogger Meta Tags
    Once you have added meta tags to your blog you can use tools to analyze them to ensure their relevance. Aim for meta tag relevancy to page content of above 90%. To check this you can use a free meta tag analyzer tool such as Submit Express or SEO Centro


    Troubleshooting and Tips
    • Observe Character Limits
      To avoid problems ensure that you keep within the maximum character limits:

      Title Tag - Maximum Characters is 60
      Site Description - Maximum Characters is 150
      Keywords - Maximum Characters is 200

    • Title Tag Tweak
      If you have inserted the title tag tweak and it is highly recommended that you do so then you will need to add the code above after the title tag adjustment in the <head> section of your template. Read more about adjusting title tags

    • Keywords
      Although some search engines no longer place too much emphasis on keywords some still do so it is worth adding keywords. Avoid using the same keyword more than 3 times. The maximum number of keywords recommended to be robot friendly is around 20.

    • Problems Reading the Code
      Some readers have reported problems with their browser reading this code. Try this document form of the article if this happens to you

    In this Blogger meta tag tutorial I have discussed the best way to add meta tags to a Blogger blog (Blogspot blog) to improve search engine results given the limitations of the Blogger platform. In this article you have learned to add both meta tags for keywords and descriptions to the home page. You have also learned how to add meta tags to an individual post. To optimize your meta tags I have included links to free meta tag analyzer tools.


    Related Articles
    Adjust Blogger Title Tags for Improved SEO
    10 Tips to Build Site Traffic for Blogger
    List of Blog Know How Tutorials for Blogger Blogs
    Add Breadcrumb Navigation to Blogger Blogspot Blog

    Sunday, April 12, 2009

    Submit Blogger Blog to Blog Directories

    This article discusses the benefits of submitting your Blogger Blogspot blog to blog directories and provides a comprehensive list of some of the best blog directories on the internet. This is an introductory article aimed at the new Blogspot blogger but is suitable for any blogger who wishes to build site traffic quickly.

    Benefits of Submitting to Blog Directories
    By adding your Blogger Blogspot blog to blog directories you are likely to increase your site traffic expotentially. If your site has been languishing in the doldrums and not getting the kind of traffic you were expecting it could be that you haven't generated enough inbound links to your site. Signing up to some top performing blog directories will create quality backlinks and expose your site to many potential visitors.

    I have signed up for each blog directory in the recommended list below and in all cases have found that they have generated at least some site traffic. A few have boosted traffic considerably and have helped me establish new blogs quickly by generating an audience. One or two blog directories have more than exceeded my expectations. TopBlogList and Blog Catalog fall into this category attracting 10 or so unique visitors within a day of sign up.

    How do Blog Directories Work?
    Most blog directories require that you place their button somewhere on your blog. In some cases the button's function is to track visitors from your site to the directory. Some buttons may reflect the ranking of your blog in relationship to other blogs in your chosen category within the directory. If you see a number appear on the button it denotes your blog's position.

    Get Organized Before You Begin Submitting to Blog Directories
    To add your blog to a blog directory you first need to register. The sign up process will run more smoothly if you get a little organized before you begin. I suggest that you take the following steps first:

    Craft a description for your blog of around 400 words

    Check your feed details as you may be asked to provide the URL of your feed. This is especially important if you have burned your feed at a feedburning service like Feedburner

    Make sure you know the exact URL address of your site. If in doubt navigate to your home page and check the the URL in the address bar

    Decide which email address to use. Blog directories tend to create a lot of mail so unless you want to have your mailbox clogged up consider carefully which email address would be best. You may decide to start a new email address specifically to handle this kind of mail.

    Decide on a username and password and stick to it throughout as it will make life a lot easier than trying to remember twenty different usernames and passwords

    Determine your top six keywords and keyword phrases as most blog directories ask you to provide these tags

    With such a big choice of blog directories to submit to I have found it pays to be systematic. Keeping a list of where you've signed up in Notepad or similar will help guard against double ups.

    How to Add a Blog Directory Button to Your Blogger Blog
    Most blog directories send out an email on sign up. Once you click on the link you membership will be confirmed. In most cases you will then be directed to a menu where you can begin adding your blog or blogs to the directory. Once you have entered the details of your blog the directory will generate the button code which can be copied and pasted into a HTML/Javascript widget. It is a good idea to place all buttons together in one widget for convenience and to reduce loading time. If you are uncertain how to add this widget to your Blogger blog please refer to my earlier post about Adding third party HTML/Javascript code to a sidebar widget.


    List of Recommended Blog Directories to Get Started
    All of the blog directories listed below I have personally signed up for as mentioned above. The blog directories are in no particular order except that I have put Blog Catalog and Top Blog List first because I have found them good.


    Blog CatalogMy BlogCatalog BlogRank
    Blog Catalog ReadersBlogCatalog is a social community for bloggers and one of the largest blog directories on the internet. It is a good option to begin promoting your own blog and to connect with other bloggers. BlogCatalog offers lots of linking options. You can add a button, a link to your blogroll or verify your site using a meta tag and dispense with a visible site link altogether. In addition you can add a Blog Catalog Readers widget to your blog like the one you see here.

    Top Blogging Bloggers Guide to Customising Blogspot Blog
    Easy sign up. Only one keyword phrase permitted so make it a goodie. Ranking is based on unique visitors

    TopBlogArea Top Blog Area
    This blog directory tracks unique visitors. No option for visitors to vote. Every month statistics are reset to zero to give everyone a chance of being highly rated

    TopBlogLists
    Ranking of pages is done according to the number of unique visits each blog brings in to Top Blog Lists

    Blog Top Sites
    A nice control panel for site management. Ranking of pages is done according to the number of unique visits each blog receives in a month.

    Top of Blogs Top of Blogs
    Ranks blogs according to the number of visits a blog receives in a certain amount of time (daily, weekly, monthly, etc.).

    BlogTopList Blog Top List
    Requires two buttons to be placed on your blog. One is the tracking button which tracks number of visitors and displays the rank of your site. The other button is the voting button. If a visitor votes for you it is equal to 100 unique visits .

    BlogPulse
    Tracks thousands of blogs. Submit yours. Try doing a check first though as you may be surprised to find your blog has already been located automatically.

    BlogFlux
    Over 140,000 blogs in the Blog Flux directory. Nice Control Panel interface.
    Sign up is immediate although all blogs added are manually checked so there is a time delay before your blog will be included.

    Blogorama
    Top 100 most popular section. Score increases depending on variables like users ratings, incoming traffic and outgoing traffic.

    My Blog Directory My Blog Directory
    Blog of the day feature chosen on the basis of the number of unique visitors directed by the blog to the directory per day. The blog of the day gets the whole of the site traffic fof that day. Blogs are listed randomly so that every blog gets equal exposure.


    Other Blog Directories You May Be Interested In
    I have not necessarily submitted a blog to these blog directories but I am providing a link if you want to follow it up. Not sure about overall chances of an increase in traffic with these ones though.

    Bloggernity
    Free Blog Directory
    Blog Rankings


    Lists of Blog Directories
    For a longer list of blog directories try:
    Great Blog Directories for a list of free directories

    In this article I have discussed some benefits of submitting your Blogger Blogspot blog to blog directories. I have suggested ways to get organized to make the process less daunting and I have recommended some blog directories which I have personally signed up for to get you started. Adding your Blogger blog to these blog directories should result in an increase in site traffic. Good luck!


    Related Articles
    How to add a HTML/Javascript widget to the Sidebar of Blogger

    Friday, April 3, 2009

    Add Feedjit Live Traffic Feed to Blogger

    Would you like to know more about the traffic visiting your Blogger blog (Blogspot Blog)? Feedjit is a free tracking tool that tracks visitors to a blog in real time and identifies what pages are visited. In this Blogger tutorial you will learn how to add a Feedjit widget to your blog which will track where visitors originate from and what pages they viewed. Adding a Feedjit widget to your Blogger blog is easy and takes less than 5 minutes. This tutorial is suitable for all Blogger bloggers (Blogspot beginners). Updated 10 October 2009.

    Feedjit monitors traffic to your site and ranks it based on popularity and relevance against the traffic received by other Feedjit users in your local area. There is a choice of 4 different widgets: Live Traffic Feed, Live Traffic Map, Recommended Reading, and Page Popularity. Each of these widgets has different functions.

    Feedjit Live Traffic Feed Widget for Blogger
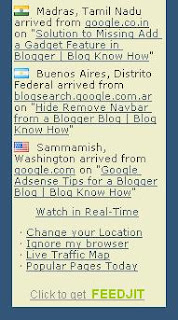
    Places a widget on your Blogger blog of the last 10 visitors. By clicking on the real time link you can actually view the last 50 or so visitors along with the keyword search phrase used to find your site. The Feedjit's Live Traffic Feed shows statistics in real-time about:

    The city and country your visitors are in

    The website they arrived from, if any

    The page they visited on your website

    Which external link they clicked to leave your site, if any

    Feedjit Traffic Map
    The Traffic Map widget places visitors to your site on a world map according to their physical location

    Feedjit Recommended Reading
    The Recommended Reading widget makes suggestions to visitors about what other blog posts they might be interested in based on general page popularity

    Feedjit Page Popularity
    The Page Popularity widget lists the 10 most popular pages that have been accessed by visitors on that day.


    How to Add a Feedjit Live Traffic Feed Widget (Gadget) to Blogger
    1. Visit Feedjit

    2. Select Live Traffic Feed.

    3. Click on the Customize It link under Live Traffic Feed. This will allow you to enter colors to match the theme of your blog. If you are in doubt I have found that the easiest method to get the custom colors of a site is to go to the Layout > Page Elements screen in Blogger and click on Add a Gadget and then Adsense. From the configuration screen that pops up you can get the colors of the background, border, title (heading in Feedjit), URL, text. If you use these same colors in your Feedjit widget it will blend in with the rest of your site. You can preview your widget to make sure it looks as you would like it before adding it to your blog.

    4. To automatically add the widget to Blogger select the Click to Add to Blogger Link and follow the instructions. Or to manually add it which I myself prefer right click the code in the box under the heading Live Traffic Feed and select copy.

    5. Navigate to Layout > Page Elements in your blog if that page is not already open

    6. Select Add a Gadget in the Sidebar and then HTML/Javascript

    7. Paste the code by placing the mouse in the box and right clicking and selecting paste

    8. Save the widget and then using the drag and drop feature of Blogger move it to your desired location. Note HTML/Javascript widgets are best placed after your other widgets for faster loading.

    9. Save Template

    10. Click on View Blog to view your newly created Feedjit widget

    11. Click on Options in the Feedjit widget and then Ignore My Browser otherwise the widget will record your visit each time you view your blog. The option on the widget will now change to Stop Ignoring Me which you can reverse by clicking on the link again.If you use more than one browser you will need to tell Feedjit to ignore you for each browser.

    This Blogger tutorial has discussed how to add a Feedjit Live Traffic Feed widget, gadget or button to Blogger to track where visitors are being directed from and what posts they are most interested in. A Feedjit Live Traffic Feed will help you learn about the visitors to your blog and what search phrase they used to arrive. To add a Feedjit Live Traffic Feed widget to Blogger is simple and takes less than 5 minutes to install.

    Related Articles
    Add Google Analytics to Your Blogger Blog
    Track Visitors to Your Blogger Blog
    List of Blog Know How Tutorials for Blogger Blogs
    Guide to Blogger Frequently Asked Questions

    Thursday, March 26, 2009

    How to Add a Subtitle to Blogger Posts

    This Blogger tutorial shows you how to easily and quickly add a subtitle to your Blogger posts (Blogspot posts) so that both search engines and readers will have more information about your post. I also discuss the benefits of adding subtitles to Blogger articles. This is an easy tweak to your Blogger blog that anyone can carry out in a couple of minutes.

    blogger Blog with Subtitle Under Post for Emphasis and Search Engine Friendliness

    Benefits of Using Subtitles in Posts
    Adding a subtitle which appears below the title of your post can be both eye catching and informative. For instance a titling schema for this post could be:

    Title: Add a Subtitle to a Blogger Blog

    Subtitle: Make Your Posts More Search Engine Friendly and User Friendly

    If you craft your titles and subtitles carefully you will encourage more targeted readers of your blog as they will be able to see at a glance what your post is about rather than reading the whole article. Your traffic therefore might be slightly less but they will be far more targeted to the content of your site resulting in a lower bounce rate.

    If the subtitle you choose for your Blogger post is keyword rich then you are also improving your chances of gaining a higher position in search engine result pages because search engines give added weight to headings and to text early on in an article. By adding a subtitle to a Blogger post you have a SEO tool which if used effectively could result in more visitors finding your site because of higher keyword density.

    You can of course add a subtitle manually to each post and format it everytime. The advantage of this method over doing it manually though is that all the formatting is in the stylesheet section of your template so you only have to change the colour scheme and font variables in one location and Blogger will look after the rest. Any change will be reflected in each and every post that has the subtitle <div> tags.


    How to Add a Subtitle to Blogger Posts
    This tutorial guides you through the steps to take to add a subtitle to your Blogger blog. The trick requires only takes a few short minutes and requires only a small snippet of code to be added to your template. Provided the instructions are followed anyone can do this including beginners and new bloggers. Interestingly it is not widely known or written about in technical blogs that a subtitle can be added to your Blogger Blogspot blog posts yet the advantages are considerable.

    1. Log in to Blogger and navigate to Design > Edit HTML

    2. Find the </b:skin> tag in your template. If you are have difficulty finding it use CTRL + F to bring up the Blogger toolbar at the bottom of your blog and enter the tag </b:skin> into the search box on the toolbar

    3. Copy and paste the code below into your template making sure that it appears before the </b:skin> closing tag.

    .subtitle{
    font-family:Trebuchet MS',Verdana,Arial,Sans-serif;
    font-size:15px;
    color: #ca1717;
    line-height:20px;
    }

    Add a Subtitle to a Blogger post - edit template and customise if desired

    Update November 14, 2010. This code inserts a subtitle in red. You will need to change this color to match your template. See later in this post for information on how to add styling or change the color of the subtitle. If you wish to use a known variable as shown in the above image you can. color: $dateheadercolor; could be used for example provided this variable had already been declared in the variables section of the template.

    4. Save Template

    5. Go to the post you wish to add a subtitle to by clicking on the Posting tab and then the Edit Posts link.

    6. Copy and paste the following code into your post ahead of any other text.

    <div class="subtitle">Subtitle Text. Please Substitute for your own text</div>

    Add a Subtitle to a Blogger Post

    7. Substitute your own text between the <div> tags

    8. Navigate to Settings > Formatting and under the last option Post Template enter the following into the box:

    <div class="subtitle"></div>

    This will mean that every time you create a post you will have the tags appear automatically. All you need do is place the text of your subtitle between the tags. If you don't want to use a subtitle for a particular post just delete the tags.

    9. Save Changes to Post and click on View Blog to admire your new subtitle.

    blogger Blog with Subtitle Under Post for Emphasis and Search Engine Friendliness

    Customizing the CSS Styling of a Blogger Subtitle
    It is easy to customize your subtitle for a different font type, color and size. Just change the code you added before the </b:skin> tag. If you want a specific color for instance you could change the color I have chosen for another color, increase the font size, and change the font face to Times Roman for instance. Thus your code would become something like this:


    .subtitle{

    font-family:Georgia, "Times New Roman", Times, serif;
    font-size:16px;
    color:#ff6600;
    line-height:20px;


    This Blogger tutorial has shown you how to add a subtitle to your Blogger posts (Blogspot posts) quickly and easily. I have discussed the benefits of inserting a subtitle feature on a Blogger blog including how this might assist search engines to correctly index your blog articles. I have also shown you how to customize your subtitle to your own individual requirements using CSS styling


    Related Posts
    List of Blog Know How Tutorials for Blogger Blogs