BlogKnowHow apologies for the technical problems with the site. We are working on it and hope to resolve the issue as soon as possible.

Monday, March 30, 2009

Google Adsense Tips for a Blogger Blog

As the Blogger platform is owned by Google it is not surprising that Blogger makes it very easy to add Google Adsense to your Blogger Blogspot blog. In this tutorial you will learn about different ways to add Google Adsense to your blog. Along the way I will be offerring a few tips about best placement of Google Adsense units. I have aimed this Blogger tutorial at new bloggers and beginners and assumes no prior knowledge of Google Adsense. Bear in mind that before you can start to add Google Adsense to your Blogger blog you will need to have created an Adsense account.

3 Ways to Add Google Adsense to Blogger
There are two main ways to add Google Adsense to Blogger: one is to use a Google Adsense widget and the other is to use a HTML/Javascript widget. There is also a third way, which is outside the scope of this article, which is to hard code the Adsense code directly into the template.

Adding a Google Adsense Widget to Blogger
An Adsense widget is a container for the Google Adsense code. Once created it is easy with Blogger's powerful interface to drag and drop widgets into different positions within your template. Google Adsense widgets can be added to the header, sidebar, footer, or body of your blog. A Google Adsense widget is created when you click on an Add a Gadget button in the Layout > Page Elements menu and then select Adsense.

How to Add a Google Adsense Widget to the Sidebar
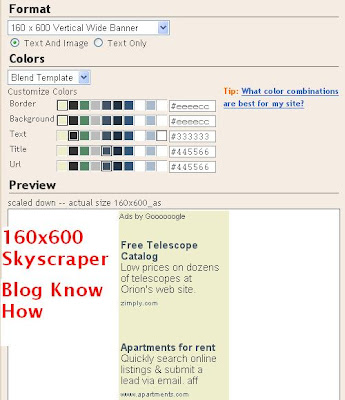
The simplest way to add Google Adsense is to select Adsense from the range of gadgets offered in the Layout > Page Elements page. Assuming you are using one of Blogger's standard templates you will more than likely be adding a skyscraper unit 160x600 or similar to the sidebar.

Google will work out the color scheme of the ad unit for you according to your template. You can override these settings if need be and configure the colors manually but stick with the default unless you have good reason not to. Another decision you will need to make is about the format of the ad unit. You can choose between text only and text and image. Personally I prefer text units for sidebars as you get more bites of the cherry than with an image unit. Images only advertise one thing while text units may provide up to 5 different links. However if you need a particular look you might still need to go for the image unit which is why Google offer this flexibility in the first place. Bear in mind that the combined text and image units are considered to be the highest earners.

Add 160x600 Google Adsense Skyscraper

Add an Adsense Widget to the Footer
Another not so widely used place for a Google Adsense unit is in the footer of your blog. If your template has a footer (eg Blogger standard templates like Minima and Rounders both have footer sections) you can add a Google ad unit to this area too. Footers are becoming increasingly popular places to add information like Archives and Follower widgets so visitors are getting used to the idea of scrolling down to the bottom of the page to check out the footer.

A linked 728x15 ad is a good choice for a footer position especially if you have a Followers widget enabled in the footer. I place this linked ad unit directly above the Followers widget. I suggest you make use of linked units if you can - you are allowed up to 3 linked units per page. Linked ad units can earn revenue if strategically placed on your blog. Do keep in mind though that Google Adsense units nearer the top and middle of the page are more visible and are likely to be your top performers.

Add 728x15 Linked Google Adsense Unit to Blogger Footer

HTML/Javascript Widget
The second way to add Google Adsense to your blog is to use a HTML/Javascript widget. Make use of these if you want to have more control over your advertising and track your Google ad units. To get the code in the first place you will need to login to Google Adsense and create each ad unit in the size of your choice from the Ads for Content menu. This will allow you to set up a unique channel for each ad unit you create so that you can identify which are your top performing units. For every new ad unit generated Google Adsense provides the code which you will need to copy and paste into a HTML/Javascript widget positioned in either the sidebar or the footer position.

How to Add Google Adsense Between Posts
Blogger is such a powerful Blogging platform with so many great features. One of these features is the facility to set Adsense to appear between blog posts. All that is needed is to navigate to Layout > Page Elements. Click on the edit Blog Posts link and check Show Ads Between Posts (last in the list)from the Select Items menu. I usually select 336x280 ad unit size as this gives a good ratio of links for the size. I also prefer text units for this position too as again you are more likely to have a visitor click on a link if they are presented with quite a few. Save and view your blog. Blogger automatically places one of three Google Adsense ads directly below each of the first three posts. If you want to space the ads further apart you can do so though in my experience there really is no advantage in doing this.

Remember that you can have up to three ad units and up to three linked ad units displayed at any one time. If you have ads in another part of your blog for instance Blogger will automatically recognise this and only display 2 other ad units. Sometimes I notice there is a bit of a glitch with Blogger and it may not display sidebar ads in favour of 3 ads in between posts so you might have to play around with this a little to get the positioning you want.

Add Google Adsense Between Posts

Note: To Center the Google Adsense Ad Unit

  1. Go to Layout > Edit HTML
  2. Check the Expand Widget Templates box
  3. Make sure you back up your template before proceeding
  4. Find the code block beginning with this line:

    <data:defaultAdStart/>

  5. Scroll down until you find these lines:

    <div class='inline-ad'>
    <data:adCode/>

  6. Change these lines to the following:
    <div class='inline-ad'>
    <P ALIGN='center'><data:adCode/></P>

  7. Save template


In my next couple of articles about Google Adsense I will be discussing how to add Google Adsense to other parts of your Blogger template including in the header, before the first post, after the last post, and in the middle of posts. This article has covered the basics of placement of Google Adsense for Blogger and offerred some suggestions about best placement of Google Adsense ad units.


Related Articles
Better Placement of Google Adsense in Blogger Blogs
Avoid 6 Common Blogger Mistakes
Blogger's Guide to Google Adsense Myths
Add Google Adsense to a Blogger Header
Blogger Guide to Google Adsense Placement
List of Blog Know How Blogger Tutorials
Solution to Missing Add a Gadget Feature in Blogger

If you are experiencing problems with the Add a Gadget feature not showing up in the Layout Screen of your Blogger Blogspot blog then read on as I have found the solution to this annoying problem.

The other day I discovered to my horror I had lost the option to Add a Gadget in the layout screen of all my blogs in Blogger. Typically it couldn't have happened at a worse time as I had just planned to sit down to write some new posts. I looked in the Blogger help section for the solution but could find no reference to the problem. I eventually found the answer, after about 15 minutes, buried in the Blogger Help Group section. I thought I would therefore post a short tip for anyone out there looking for a quick answer to the loss of the Add a Gadget function from the Layout Screen.

Clear Your Browser's Cache
When the Add a Gadget feature is missing from you Layout screen and you have tried refreshing it probably means you need to clear the cache of your browser. In Internet Explorer 6 you would go to the Tools menu and choose Internet Options from the drop down menu. In the dialog box that appears select the General tab and then click on the Delete Files from the Temporary Internet Files Section (middle). Once done close the dialog box and refresh the Layout Screen in Blogger. With any luck you will now be able to see the Add a Gadget option once again. For other browsers follow the directions in the browser's help section on clearing the cache or check out Bloggers Help Article about clearing cache.

Thanks to the Blog Doctor for this solution. You really saved the day!

A short tip on how to fix the problem of add a gadget missing from the layout screen in Blogger.

Thursday, March 26, 2009

How to Add a Subtitle to Blogger Posts

This Blogger tutorial shows you how to easily and quickly add a subtitle to your Blogger posts (Blogspot posts) so that both search engines and readers will have more information about your post. I also discuss the benefits of adding subtitles to Blogger articles. This is an easy tweak to your Blogger blog that anyone can carry out in a couple of minutes.

blogger Blog with Subtitle Under Post for Emphasis and Search Engine Friendliness

Benefits of Using Subtitles in Posts
Adding a subtitle which appears below the title of your post can be both eye catching and informative. For instance a titling schema for this post could be:

Title: Add a Subtitle to a Blogger Blog

Subtitle: Make Your Posts More Search Engine Friendly and User Friendly

If you craft your titles and subtitles carefully you will encourage more targeted readers of your blog as they will be able to see at a glance what your post is about rather than reading the whole article. Your traffic therefore might be slightly less but they will be far more targeted to the content of your site resulting in a lower bounce rate.

If the subtitle you choose for your Blogger post is keyword rich then you are also improving your chances of gaining a higher position in search engine result pages because search engines give added weight to headings and to text early on in an article. By adding a subtitle to a Blogger post you have a SEO tool which if used effectively could result in more visitors finding your site because of higher keyword density.

You can of course add a subtitle manually to each post and format it everytime. The advantage of this method over doing it manually though is that all the formatting is in the stylesheet section of your template so you only have to change the colour scheme and font variables in one location and Blogger will look after the rest. Any change will be reflected in each and every post that has the subtitle <div> tags.


How to Add a Subtitle to Blogger Posts
This tutorial guides you through the steps to take to add a subtitle to your Blogger blog. The trick requires only takes a few short minutes and requires only a small snippet of code to be added to your template. Provided the instructions are followed anyone can do this including beginners and new bloggers. Interestingly it is not widely known or written about in technical blogs that a subtitle can be added to your Blogger Blogspot blog posts yet the advantages are considerable.

1. Log in to Blogger and navigate to Design > Edit HTML

2. Find the </b:skin> tag in your template. If you are have difficulty finding it use CTRL + F to bring up the Blogger toolbar at the bottom of your blog and enter the tag </b:skin> into the search box on the toolbar

3. Copy and paste the code below into your template making sure that it appears before the </b:skin> closing tag.

.subtitle{
font-family:Trebuchet MS',Verdana,Arial,Sans-serif;
font-size:15px;
color: #ca1717;
line-height:20px;
}

Add a Subtitle to a Blogger post - edit template and customise if desired

Update November 14, 2010. This code inserts a subtitle in red. You will need to change this color to match your template. See later in this post for information on how to add styling or change the color of the subtitle. If you wish to use a known variable as shown in the above image you can. color: $dateheadercolor; could be used for example provided this variable had already been declared in the variables section of the template.

4. Save Template

5. Go to the post you wish to add a subtitle to by clicking on the Posting tab and then the Edit Posts link.

6. Copy and paste the following code into your post ahead of any other text.

<div class="subtitle">Subtitle Text. Please Substitute for your own text</div>

Add a Subtitle to a Blogger Post

7. Substitute your own text between the <div> tags

8. Navigate to Settings > Formatting and under the last option Post Template enter the following into the box:

<div class="subtitle"></div>

This will mean that every time you create a post you will have the tags appear automatically. All you need do is place the text of your subtitle between the tags. If you don't want to use a subtitle for a particular post just delete the tags.

9. Save Changes to Post and click on View Blog to admire your new subtitle.

blogger Blog with Subtitle Under Post for Emphasis and Search Engine Friendliness

Customizing the CSS Styling of a Blogger Subtitle
It is easy to customize your subtitle for a different font type, color and size. Just change the code you added before the </b:skin> tag. If you want a specific color for instance you could change the color I have chosen for another color, increase the font size, and change the font face to Times Roman for instance. Thus your code would become something like this:


.subtitle{

font-family:Georgia, "Times New Roman", Times, serif;
font-size:16px;
color:#ff6600;
line-height:20px;


This Blogger tutorial has shown you how to add a subtitle to your Blogger posts (Blogspot posts) quickly and easily. I have discussed the benefits of inserting a subtitle feature on a Blogger blog including how this might assist search engines to correctly index your blog articles. I have also shown you how to customize your subtitle to your own individual requirements using CSS styling


Related Posts
List of Blog Know How Tutorials for Blogger Blogs

Friday, March 20, 2009

List of Blog Know How Blogger Tutorials

Find the articles and Blogger tutorials you are most interested in with this complete linked list of every published post on Blog Know How since its inception.

With so many articles now some are getting buried in archives so I decided it might be useful for readers to have a linked list of all the Blogger Tutorials that appear on this site. For convenience I have grouped them under some headings including: SEO - Search Engine Optimization, Feeds, Social Bookmarking, Customising Blogger, Tracking Visitors, Common Blogger Pitfalls and Mistakes, Banners and Advertising, Google Adsense, Adding Gadgets to Blogger

Updated ***

SEO - Search Engine Optimisation for Blogger Blogspot Blogs

Blogger Blogspot Tutorials about:

  • Building Site Traffic
  • Tracking Site Visitors
  • Proper Indexing by Search Engines
  • SERP's - Search Engine Results Pages
  • Improve Google Page Rankings

Hot SEO tips for Blogger Blogspot Bloggers
10 Tips for Building Site Traffic for Blogspot Blogs
Blogger Blogspot SEO Tips and Tricks
Add Breadcrumb Navigation to Blogger Blogspot Blog
Add Meta Tags to Blogger Blog for Better SEO
Make Money with Adsense Keywords and Blogger
Increase Google Page Rank Blogger Blogspot

Make Money from Blogger
Add a Paypal Donate Button to Blogger ***
Tips for Adding Google Adsense to Blogger
Better Placement of Google Adsense in Blogger
Add Google Adsense to a Blogger Header ***
Bloggers Guide to Google Adsense Myths
Add Google Adsense or Banner Above Blogger Header
Blogger Guide to Better Google Adsense Placement
Make Money with Adsense Keywords and Blogger
Make Money By Adding Banner Ads to Your Blogger Blog
5 Easy Ways to Make Money from Blogger

Add Chitika Ads to Blogger Blogspot

Make Money Add an Amazon Widget to Blogger
Add Amazon Product Links to Blogger Posts


Tweaking Blogger for Better Search Engine Results
Adjust Blogger Title Tags to Improve SEO ***
How to Create Search Engine Friendly Permalinks for Blogger
Add Meta Tags to Blogger Blog for Better SEO
Add Breadcrumb Navigation to Blogger Blogspot Blog ***

Submitting Your Blogger Blog to Search Engines
Submit a Blogger Sitemap to Major Search Engines
Add Blogger Sitemap to Bing Webmaster Tools (formerly MSN Live Search ***
Submit Your Blogspot Sitemap to Yahoo
Add a Blogspot Blog Sitemap to Google

Submit Blogger Blog to Yahoo Site Explorer


Add Your Blogger Blog To Blog Directories
Submit Your Blogger Blog to Blog Directories


Tracking Visitors to Your Blogger Blog
Track Visitors to Your Blogger Blog
Add Google Analytics to Blogger Blog
Add a Feedjit Live Traffic Feed to Your Blogger Blog


Adding Google Adsense to a Blogger Blogspot Blog
Tips for Adding Google Adsense to Blogger
Better Placement of Google Adsense in Blogger
Blogger Guide to Better Google Adsense Placement

Add Google Adsense to a Blogger Header ***
Add Google Adsense or Banner Above Blogger Header
Place Google Adsense Below Post Title in Blogger
Add Google Adsense Below Blogger Post Content

5 Easy Ways to Make Money from Blogger
Bloggers Guide to Google Adsense Myths


Banners and Advertising on Your Blogger Blog
Make Money By Adding Banner Ads to Your Blogger Blog
How to Add a Banner to the Blogger Sidebar ***
Add an Affiliate Banner to Blogger Header
Add Google Adsense or Banner Above Blogger Header
Add an Affiliate Banner Below Post in Blogger ***


Make the Most of Blogger Blogspot Feeds
Add a Categories Section to Blogger ***
Add a Recent Posts Feed to a Blogger Blogspot Sidebar
Add a Recent Comments Feed to a Blogger Blogspot Sidebar ***
Burn Blogger RSS Feeds at Feedburner
Blogger RSS Feeds and Feedburner
Add a Feedburner FeedFlare to Blogger Feed
Add Email Subscription Form and Links to Blogger Blogspot


Add a Feed Icon to Your Blogger Blog - Burgundy Add a Feed Icon to Your Blogger Blog - Dark Blue Add a Feed Icon to Your Blogger Blog -Blue Green


Social Bookmarking for Blogger Add an Add This Social Bookmarking Button to Blogger
Add a Social Bookmarking Button to Blogger
Add Social Bookmark Buttons to Blogger
Free Social Bookmark Buttons for Blogger

Tips to Add Digg Button to Blogger Blogspot
Add Twitter Followers Counter to Blogger
Add Twitter Badge or Button to Blogger

Add Gadgets to Your Blogger Blog
Add a Categories Section to Blogger ***
Add a Welcome Message to Blogger Using a Text Gadget
Add an Outbrain Ratings and Recommendations Widget to Blogger
Add a Printer Button and Link to Blogger Blogspot
Add a Simple Image Slider to Blogger
Add a Paypal Donate Button to Blogger ***
Add a Flickr Slideshow Gadget to Blogger ***


Blogger Pitfalls
Avoid 6 Common Mistakes Bloggers Make


Customizing Blogger for Added Functionality

Blogger Navigation
Add a Horizontal Links Navigation Menu to Blogger ***
Hide Remove Disable Blogger Navbar
Add Breadcrumb Navigation to Blogger Blogspot Blog ***
How to Add Internal Links Within Blogger Posts ***
Read More Links with Jumps Breaks in Blogger Blogspot ***

Blogger SEO
Adjust Blogger Title Tags to Improve SEO ***
How to Create Search Engine Friendly Permalinks for Blogger
Add Meta Tags to Blogger for Better SEO
Add Breadcrumb Navigation to Blogger Blogspot Blog ***

Blogger Commenting
Embedding a Comment Form Below Each Post
How to Get More Comments on Your Blogger Blog
Add Missing Embedded Comment Form to Blogger
How to Add Highlighting to Author Comments in Blogger Posts ***
Add a Recent Comments Feed to a Blogger Blogspot Sidebar ***
How to Add a Profile Image to Blogger Comments Section ***

Blogger Templates
How to Find and Apply Older Style Default Blogger Templates in Blogger

Blogger Posts
How to Add a Subtitle to a Blogger Post ***
Choose Your Own Blogger Post Dates
How to Add a Table to a Blogger Blogspot Post ***

Blogger Images
How to Remove Image Border in Blogger Template Simple ***
How to Change or Delete Image Borders in Blogger Posts ***
How to Remove the Link from a Single Image in a Blogger Post


Blogger Look and Style
Show Date Above Blogger Post Title
How to Change the Bullet Point Style in Blogger (Blogspot) ***
How to Change the Font of the Blog Description in the Blogger Header
How to Change the Font Color of the Blog Description in Blogger

Blogger Functionality
Add a Printer Button and Link to Blogger Blogspot
Add an Email This Post Link to Blogger
Add 3 Column or 4 Column Footer to Blogger
Add a Simple Image Slider to Blogger


Free Internet Tools for Blogspot Blogger
Free Essential Tools for a Blogspot Blogger

Blogger Templates
Add 3 Column or 4 Column Footer to Blogger
Show Date Above Blogger Post Title
How to Change the Font of the Blog Description in the Blogger Header
How to Choose a Custom Blogger Template to Avoid Problems


Troubleshooting and Known Issues with Blogger
Add a Gadget Option Missing From Layout Screen Solution
How to Delete a Blogger Blogspot Blog
Show Date Above Blogger Post Title
How to Show a Quick Edit Gadget Wrench in Blogger (Blogspot)***
How to Show the Quick Edit Pencil in Blogger (Blogspot) if Missing***


This is a list of the current tutorials on this site which is a ready resource for site visitors. Stay current by bookmarking this page and check back often as I will be continually adding to this growing list.

Thursday, March 19, 2009

Add a Categories Section to a Blogger Blog (Blogspot Blog)

Blogspot blogs at Blogger.com have no categories only labels. This Blogger tutorial will show you how to manually create categories in Blogger from your existing labels so that all the articles listed under a particular label will be displayed.

While this way to add categories to Blogger is not an ideal solution it will mean that you can display a logical grouping of your most popular articles under the one heading.

This article is aimed at new bloggers and beginner bloggers although it is suitable for all Blogger bloggers (Blogspot bloggers). No changes to the template are required to add these categories to your Blogger blog (Blogspot blog).

How to Create Categories from Labels in Blogger
One easy way to create a categories section in Blogger is to simply rename the title of the labels widget as categories. This solution does not work for me because on this blog I have a huge number of labels and I don't want to show this widget at the top of my sidebar.

An easy way round this problem is create a separate categories section. If you look at the sidebar of this blog you will notice that I have several major categories at the top so that a new visitor will find what they are looking for quickly under these broad headings.

Example of Categories Section from Blog Know How sidebar
To add a categories section to a Blogger blog (Blogspot blog) follow these simple steps:

1. Decide how you want to group your articles according to the labels applied and what group heading you want to give to each grouping of articles.

2. For the first category navigate to the individual page of the label you wish to use by clicking on the label in your sidebar. Copy the URL address of this page from the address bar in your browser (right click and select copy). For example the URL address of the label of Blogger Tutorials on this site is:

http://blogknowhow.blogspot.com/search/label/Blogger%20Tutorials

3. From the Blogger Dashboard go to Design > Page Elements

4. Click Add a Gadget in the sidebar and select Links List

5. In the Configure Link List dialog box that appears paste the link to your label into the New Site URL box

blogger Configure Link List to Add New Categories Section to Your Blogger Blog

6. Enter the name of your label or some alternative text if you wish into the New Site Name text box.

7. Enter Categories as the title

8. Choose between sort alphabetically, reverse alphabetically or don't sort

9. Click on Add Link to add the link to your new categories list

10. Click on Save

11. For every label you wish to put into the Categories Section copy the link and add it to the Configure Links List. By the end you will end up with two or more categories in your list

12. Use the up and down arrows for each link to shuffle them around until you find the desired order

Blogger Configure Link List - Added Links to Create Categories in Blogger

Limit the Number of Posts Displayed in the Categories Section
To put a limitation on the number of posts displayed in the new categories section you will need to adjust the URL's of each label as follows:

From:

http://yoursite.blogspot.com/search/label/CategoryName

To:

http://yoursite.blogspot.com/search/label/CategoryName?max-results=max number of posts to display

So for the category Blogger Tutorials on this site for example I would enter the following to have only 25 posts displayed:

http://blogknowhow.blogspot.com/search/label/blogger%20Tutorials?max-results=25

This Blogger tutorial has shown you how to manually add a categories section to the sidebar of your Blogger Blog (Blogspot blog) using the Link List widget.

Related Articles
List of Blog Know How Tutorials for Blogger Blogs
How to Add CSS Styling to Blockquotes in Blogger
How to Add, Delete or Remove Blogger Image Borders
How to Align and Justify Posts in Blogger
How to Add a Divider Between Blogger Posts
How to Add or Change a Background Image in a Blogger Template

Sunday, March 15, 2009

Submit a Blogger Sitemap to Major Search Engines

If you haven't submitted your Blogger website and sitemap to the major search engines yet this article will help you through the process. Submitting your Blogger (Blogspot) blog to the two most popular search engines Google and Yahoo is a must if you want your site crawled and indexed quickly and, of course, to receive visitors. You may also want to cast your net a little wider. If so there are a couple of other search engines worthy of note that you may not have even considered. This article explores the steps involved in submitting your blog and sitemap to 5 major search engines: Google, Yahoo, MSN Live Search, Moreover.com and Ask.com


Submit Your Site and Sitemap to Google
For a step by step walkthrough of how to submit your Blogger blog to Google, verify your site and add a sitemap please refer to my article Submit Your Blogspot Blog Sitemap to Google

Google Webmaster Tools Index Stats Page

Submit Your Site and Sitemap to Yahoo
Yahoo has a fair share of the search engine market and therefore getting your Blogger blog crawled and indexed needs to be a priority. For an in depth discussion on how to submit your site, verify it and submit a sitemap to Yahoo Site Explorer please see my article Submit Blogspot Sitemap to Yahoo

Yahoo Site Explorer

Submit Your Site and Sitemap to MSN
You can now submit a sitemap directly to MSN at Webmaster Center. For detailed steps in submitting a Blogger site and sitemap to MSN Live Search please refer to my article Add a Blogger Sitemap to MSN Live Search

MSN Webmaster Center

Submit Your Site and Sitemap to Moreover.com
Historically submitting your Blog sitemap to Moreover.com expedited indexing in MSN because of a standing arrangement that Moreover would provide the submitted feeds to MSN for crawling and indexing. At the time of writing this article it is not clear if this is still useful as sitemaps can now be submitted to MSN directly. However, it can't do any harm so I suggest giving it a go.

To submit a sitemap to Moreover copy and paste the following line into your internet browser address taking care to replace yoursitename with the actual name of your site:

http://api.moreover.com/ping?u=http://yoursitename.blogspot.com/rss.xml

If all is well you will receive the following success message:

Moreover Sitemap Submission Success MessageSubmit Your Site and Sitemap to Ask.com
It is worth submitting your sitemap to Ask.com, previously known as Ask Jeeves. It is considered an important search engine and owns Excite, Bloglines, MyWay and iWon. Ask.com also is a participant in the Sitemaps Protocol Program.

It is easy to submit your Blogger sitemap to Ask.com. Simply copy (Ctrl + C command) and paste (Ctrl + V command) the following line into your internet browser address bar. Be sure to substitute yoursitename with the actual name of your site.

http://submissions.ask.com/ping?sitemap=http://yoursitename.blogspot.com/rss.xml

Provided there are no issues you will see the success screen:

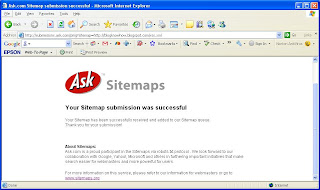
Ask.com Sitemap Submission Success Screen

This article explored how to go about submitting your blog and sitemap to 5 major search engines: Google, Yahoo, MSN Live Search, Moreover.com and Ask.com

Related Posts
Submit Your Blogspot Blog Sitemap to Google
Submit Blogspot Sitemap to Yahoo
Add a Blogger Sitemap to MSN Live Search
10 Tips for Blogspot Bloggers on Building Site Traffic

Add a Blogger Sitemap to MSN Bing Webmaster Tools

How to add a Blogger Blog and Blogger Sitemap (Blogspot Sitemap) to Bing Webmaster Tools formerly MSN Live Search. Step by step instructions for Blogspot bloggers who want to improve search engine optimization of their blog.

Although Bing (formerly MSN Live Search) gets a fraction of search engine traffic compared to Google and Yahoo it is still worthwhile submitting your Blogger sitemap (Blogspot sitemap) and blog to Bing. The advantages of adding your blog to Bing is that you will learn more about how your site is crawled and what keywords visitors use to access your blog pages.

Updated 24 November 2010
Due to the significant changes to MSN Live Search (now Bing) and the Webmaster Center the instructions my original instructions are now out of date. I have written a completely new set of instructions (labelled new instructions) that you will find at the top of this blog post which covers how to add a Blogger Blog and Blogger Sitemap to Bing Webmaster Tools. I have chosen to leave the old instructions in place as they do explain how to add a rss feed or atom feed rather than the default posts feed if you prefer.

This Blogger tutorial covers the steps involved to add your Blogspot blog to Bing (MSN). Part One deals with how to add a site to Bing Webmaster Tools while part two takes you through the steps to add a Blogger sitemap to Bing Webmaster Tools. Both these tutorials are rated easy and can be performed by anyone using Blogger.

+++++++ NEW INSTRUCTIONS +++++++

How to Add a Blogger Blog (Blogspot Blog)to Bing Webmaster Tools

  1. Create an account or sign into Bing at MSN. If you have a hotmail account you will already have access to Bing Webmaster Tools

  2. Navigate to the Bing Webmasters Tools page


  3. Installing Skylight is purely optional. Silverlight is Microsoft's competitive product for Adobe Flash. Try it if you wish as it adds some extra functionality but for the purposes of this Blogger tutorial it is not necessary.

  4. From the Bing Webmaster home page click on Add Site

  5. Fill in the URL address of your Blogger blog eg blogknowhow.blogspot.com

    To add a Blogger blog to Bing fill in the URL address of your blog at Bing Webmaster Tools
  6. Click on Submit

  7. Your blog will now appear on the list of added sites under your Bing Webmaster account


  8. Click the Verify Site link at the right of your blog


  9. Choose Option 2 - Add meta tag to your default webpage


  10. Copy the meta tag code that appears in the dialog box by right clicking on it with your mouse and selecting copy. Keep the Bing Webmaster Tools window open as we will be returning


  11. Login to your Blogger account if not already logged in using a different browser window

  12. From the Dashboard go to Design > Edit HTML

  13. Paste the code below the <head> tag and before <b:skin> and as early as possible

    For the new generation of default Blogger templates I suggest placing the code just below these two lines:

    <head>
    <meta content='IE=EmulateIE7' http-equiv='X-UA-Compatible'/>


    For earlier generations of default Blog templates and custom templates I suggest you place the Bing Webmaster meta tag after these lines:
    <head>
    <b:include data='blog' name='all-head-content'/>

  14. Click on Save Template

  15. Return to Bing Webmaster and click on the Verify button

  16. If successful your Blogger blog will be added to the list of sites. Information about your blog will show not available as it takes at least 48 hours to activate.


  17. Click on your blog and you will be taken to the site information screen. Notice the menu (bank of tabs) for easy navigation (as pictured). Use the dropdown menu to navigate between your blogs if you add more than one to Bing Webmaster.


How to Add a Blogger Sitemap (Blogspot Sitemap) to Bing Webmaster
  1. Sign in to Bing Webmaster if not already signed in

  2. Click on your Blogger blog from the list of sites

  3. Click on the Crawl tab from the top menu

  4. Click on Sitemaps from the menu on the left hand side


  5. An Add Sitemap dialog box will pop up. Enter the following URL of the default posts feed of your Blogger blog eg

    http://yourblogname.blogspot.com/feeds/posts/default

    Replace the yourblogname with the name of your blog


  6. Click on the Submit button

  7. If you have entered the details of your sitemap correctly you will now be presented with a added sitemap success screen


In this Blogger tutorial I have taken you through the steps involved in submitting a Blogger blog (Blogspot blog) to Bing Webmaster Tools (MSN). I have also shown you how to add a Blogger sitemap to Bing Webmaster Tools by using the default Blogger posts feed.


+++++++ OLD INSTRUCTIONS BELOW THIS LINE +++++++

Steps to Add Your Blog and Sitemap to MSN Live Search

1. Login to MSN Webmaster Center with a hotmail account if you have one otherwise you will need to sign up first.

MSN Live Search Webmaster Center Home Page
2. By default you will be taken to the Site List - Webmaster Tools page.

3. Click on Add a Site and enter the URL address of your site in the box provided

4. Enter the address of your sitemap in the box provided:

http://yoursitename.blogspot.com/atom.xml

Be sure to substitute yoursitename with the actual name of your site

5. Enter your email address if you wish MSN Live Search to contact you if it encounters problems

6. Sign up for periodic news updates if you wish otherwise uncheck the box

7. Click on the Submit button

8. Next you will be taken to the Authenticate Ownership of Website Page. You will be given two authentication options choose the Meta Tag Authentication Method by highlighting the code provided and copying it using Ctrl + C. Keep this browser window open as we will come back here.

MSN Live Search Authenticate Site Page
9. In a new window of your browser login in to your Blogger blog and navigate to Layout > Edit HTML. It is a good idea to backup your template at this point in case you inadvertently overwrite some code. To backup your site Click on Download Full Template

10. Locate the <head> tag which will be about 5-10 lines from the top. You can paste the code anywhere in the head section. I suggest after this line:

<title><data:blog.pageTitle/></title>

Add MSN Live Search Authentication Code to Blogger Template
11. Save Template

12. Return to MSN Live Search Webmaster Centre and click on the Return to Site List button

13. All going well you will now be able to see your Blogger website listed in the list of your sites

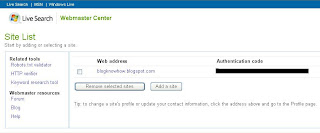
MSN Site List Page for Blog Know How
14. Click on your site and you will be taken to the Site Summary - Webmaster Tools page

MSN Live Site Summary Page for Blog Know How
15. It is now a matter of waiting for MSNBot to crawl and index your site. You will need patience as this is by no means a fast process. Don't forget to sign out of MSN Webmaster Tools.


For a quicker response you can also try submiting the sitemap of your blog to Moreover.com. Historically Moreover has provided the submitted feeds to MSN for crawling and indexing. I am not entirely certain this is still in force but it is simple to do so worth a shot I say. Simply copy the code below and paste it into your browser address bar

http://api.moreover.com/ping?u=http://yoursitename.blogspot.com/rss.xml

Be sure to substitute yoursitename with the actual name of your site

If successful you will receive the following message:

Thank you for your ping. The moreover database will be updated with the new data from your url - http://yoursitename.blogspot.com/rss.xml as soon as possible


Update 24 November 2010
This ping is no longer working. I suggest you try a ping service or blog and ping tool. If you search under "ping a blog" you will find there are lots of services available.


In this tutorial we have discussed in detail how to submit your Blogger Blogspot blog to MSN Live Search, authenticate your site and add a sitemap.

Related Posts
Submit a Blogger Sitemap to Major Search Engines
10 Tips for Blogspot Bloggers for Building Site Traffic
List of Blog Know How Tutorials for Blogger Blogs

Saturday, March 14, 2009

Add a Recent Comments Feed to Blogger Sidebar

When you add a recent comments widget to a Blogger blog (Blogspot blog) using your Blogger comments feed you will encourage visitors to comment on your blog and hopefully improve blog traffic blog.

It only takes a couple of minutes to add a Recent Comments widget to Blogger. It is also easy since it requires no editing of your Blogger template. This Blogger tutorial assumes limited technical knowledge of Blogger and is mostly aimed at new bloggers and beginners although it is suitable for any Blogspot blogger looking to increase action on their blog.

If you would like to add a Recent Posts Feed to your Blogger website please refer to my earlier article Add a Recent Posts Feed to a Blogger Blog (Blogspot Blog)

Below I will take you through the steps of adding a feed widget to the Blogger sidebar so that the Blogger default comments feed will be displayed there. Equally you could add this widget to the footer if you prefer.

I am going to show you two different widgets to add Recent Comments to your blog. Which you choose is up to you and largely depends on how many comments you wish to display.

Method 1 - Using the Blogger Feed Widget to
Add Recent Comments Feed to Blogger

This first method is the old way to add recent comments to Blogger using the Blogger feed widget and is still my preferred method. The limitations are though that the maximum number of comments displayed is 5.

Method 2 - Alternative Method to Add Recent Comments Feed to Blogger
There is another Blogger widget that can be added to Blogger which will display up to 10 of the most recent comments on your blog. By default it shows the author's name and this can not be removed. If you are happy with this and would like more comments displayed this is a nice widget. One problem with the widget though is it will not necessarily display in the font of your blog. You will need to check this by installing it to try it out.

Add a Recent Comments Feed to the Sidebar of a Blogger Blog

  1. Login to you Blogger blog

  2. From the Dashboard go to Design > Page Elements

  3. Click on Add a Gadget in the sidebar

  4. Select the Feed widget from the list of Basic Widgets

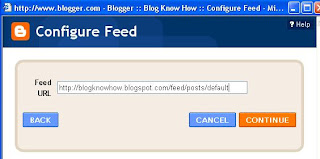
  5. A popup dialog box will appear requesting you to configure the URL of your feed. Enter the following text into the box labelled URL Feed substituting the URL address of your blog name eg blogknowhow.blogspot.com for yourblogname:

    http://yourblogname.blogspot.com/feeds/comments/default

    Add Site Feed Widget to Blogger Sidebar and Preview Site Feed of Recent Comments
  6. Click on continue. If you have entered the address of your comments URL feed correctly Blogger will retrieve your feed and display a preview in a dialog box. The feed will include links to the last five comments made on your blog.

    Preview of Comments Feed for Blog Know How Blogger Blog
  7. Unless you want less than 5 comments to display leave show 5 as is

  8. Under Title replace the name of your blog with Recent Comments instead

  9. If you want to be able to see the date of the comment check the Items Dates box

  10. If you want to have the comment author displayed check the Item/Sources Author

  11. Unless you are worried about visitors leaving your blog there is no real need to check Open in a New Window(note this option has been added since I first wrote this tutorial so it is not in the picture)

  12. Click on Save

  13. Click on View Blog to see your new Recent Comments feed in action.


Below you can see an example of what the recent comments widget will look like. (Naturally it will be styled to suit your blog.) You can also see it operating in the sidebar of this blog.

View of Blog Know How Site with Recent Comments Feed Widget Installed
8. If you want to change where it appears in the sidebar this can be achieved by returning to Design > Page Elements and using drag and drop to position the widget into the spot of your choice on the Blogger sidebar.

Troubleshooting
If you are using a feed delivery service like FeedBurner the default comment feed URL will be being redirected by Blogger.com. In this case you will need to enter the Feedburner address of the feed which is likely to be something like this:

http://feeds2.feedburner.com/Comments/YourSiteName

Notice how Feedburner capitalizes your blog name. Check the exact address at Feedburner if you are not sure of the feed address. For more on burning your feed at Feedburner check out these articles: Blogger RSS Feeds and Feedburner and Burn Blogger RSS Feeds at Feedburner and Add a Feedburner FeedFlare to a Blogger Feed

Method 2 - Using a Contributed Gadget to Add a Recent Comments Widget to Blogger (Blogspot)

  1. Login to you Blogger blog

  2. From the Dashboard go to Design > Page Elements

  3. Click on Add a Gadget in the sidebar

  4. Click on Most Popular from the menu on the left hand side of the Add a Gadget window

  5. Select Recent Comments

  6. Change the number of comments to display according to your individual blog requirements. The Preview box will show you what your widget will look like with less than 10 comments

  7. Change the Summary Length to 100 px or leave as is if you prefer


  8. Click on Save to activate your Blogger widget

  9. Click on View Blog to see your Recent Comments Widget displayed

  10. Use drag and drop in Design > Layout to position your widget as you desire


This Blogger tutorial has demonstrated two different methods of adding a recent comments gadget to your Blogger blog (Blogspot blog) using Blogger widgets. The recent comments widget is probably best displayed in the Blogger sidebar or it can be moved to the footer if you prefer and of course depending on your blogger template.

Related Articles
List of Blog Know How Tutorials for Blogger Blogs
Add a Recent Posts Feed to a Blogger Blog
Blogger RSS Feeds and Feedburner
Burn Blogger RSS Feeds at Feedburner
Add a Feedburner FeedFlare to a Blogger Feed

Add a Recent Posts Feed to a Blogger Blog

One very simple way to increase page views of your Blogger (Blogspot) blog is to add a recent posts feed to your site. The procedure is easy and effective and does not require any template tweaking. This tutorial assumes limited technical knowledge of Blogger and is mostly aimed at new bloggers and beginners although it is suitable for any Blogspot blogger who wants to increase site traffic.

If you would like to add a recent comments feed to your Blogger (Blogspot) blog please see my tutorial Add a Recent Comments Feed to a Blogger Blog

Below I will take you through the steps of adding a widget so that your feed is displayed in your Blogger blog's sidebar. Unfortunately the maximum number of items that can be displayed in the posts feed at this point is limited to 5 due to a Blogger limitation. I have not found a hack to increase this level but when I do I will update this post.


Add a Recent Posts Feed to the Sidebar of a Blogger Blog

1. Login to you Blogger blog and navigate to Layout > Page Elements

2. Click on Add a Gadget in the sidebar and select the Feed widget

3. A popup dialog box will appear requesting you to configure the URL of your feed. Enter the following text into the box:

http://yoursitename.blogspot.com/feeds/posts/default

Be sure to substitute yoursitename for the name of your site

Add Site Feed Widget to Blogger Sidebar and Configure Site Feed

4. If you have entered the address of your post's feed correctly Blogger will retrieve your feed and display a preview in a dialog box. The feed will include links to the last five posts on your site.

5. Delete the name of your blog and type in Recent Posts instead

Add Site Feed Widget to Blogger Sidebar and Preview Site Feed of Recent Posts
6. Click on Save

7. Click on View Blog to see your new Recent Posts feed in action.

Blogger Sidebar Widget Featuring Recent Posts Feed on the Blog Know Know website
8. If you want to change where it appears in the sidebar this can be achieved by returning to Layout > Page Elements and using the drag and drop feature to position the widget.


Troubleshooting
If you are using a feed delivery service like FeedBurner your default feed URL will be being redirected by Blogger.com. In this case you will need to enter the Feedburner address of the feed which is likely to be something like this:

http://feeds2.feedburner.com/YourSiteName

Notice how Feedburner capitalizes your blog name. Check the exact address at Feedburner if you are not sure of the feed address. For more on burning your feed at Feedburner check out these articles: Blogger RSS Feeds and Feedburner and Burn Blogger RSS Feeds at Feedburner and Add a Feedburner FeedFlare to a Blogger Feed


This tutorial demonstrates how to add a recent posts feed to your Blogger (Blogspot) blog so that it can be displayed in a widget in the sidebar of your Blogger blog.

Related Articles
Add a Recent Comments Feed to a Blogger Blog
Blogger RSS Feeds and Feedburner
Burn Blogger RSS Feeds at Feedburner
Add a Feedburner FeedFlare to a Blogger Feed